Information Technology

Three Ways How Jamboard G Suite Can Empower Your Business

Jamboard Gsuite - Source Benq

With the fast-changing and dynamic business environment today, teams can now work more closely together regardless of distance and space with the help of Jamboard G Suite.

Major business decisions must be done quickly and eliminate repetitive and tedious manual tasks to ensure success and productivity.

G Suite makes all these things possible. It takes and transforms team collaboration to a whole new level by providing innovative tools to solve problems faster and allowing team members to focus their time on more urgent matters. 

Here are the three ways how G Suite unlocks the new kind of collaboration that empowers many businesses in the modern world.

  • Jamboard G Suite Transforms the Way Teams Collaborate

In any business, team collaborations have a powerful impact on its success.  And to achieve this kind of feat, more efficient and creative ways of sharing ideas are needed. 

G Suite provides intelligent tools for creating new and effective ways to help team members work faster and smarter. 

The jamboard, for example, is a digital whiteboard powered by G Suite that allows team members to collaborate on different files in real-time regardless of their location. 

With Jamboard’s innovative features, team members can actively collaborate and share their ideas by inserting texts, images, or videos directly from their files or the web.

  • Improves Accessibility and Connectivity with G Suite’s Collaborative Tools

Another way G suite allows team members to connect and work effectively as one team is through different collaborative tools and services. 

These services include custom and secure business emails, integrated online calendars, collaborative word documents, and smart spreadsheets.

The team can also safely meet and connect from anywhere through a video conferencing app built on Google’s robust and highly secure global infrastructure. 

  • Brings Raw Creativity and Organizational Skills to A New Level

The perfect combination of Jamboard and G Suite provides essential solutions to improve creativity and organizational skills among team members.

Teams can also share their creative ideas in real-time through sessions called jams. Each jam session is saved in the cloud and can easily be accessed and shared within the team. 

Files saved in the Google Drive folder can be systematically organized and shared via the cloud. Anyone in the team can always refer back to the previous jam sessions whenever they need to.

With G Suite, important emails can be converted into calendar events and transform team meetings into collaborative sessions within the interactive Jamboard interface. 

In summary, G Suite is a highly intelligent and innovative tool that, when utilized properly and efficiently, can transform and empower any business in achieving great success.

Three Ways How Jamboard G Suite Can Empower Your Business Read More »

Jamboard Gsuite - Source Benq

With the fast-changing and dynamic business environment today, teams can now work more closely together regardless of distance and space with the help of Jamboard G Suite.

Major business decisions must be done quickly and eliminate repetitive and tedious manual tasks to ensure success and productivity.

G Suite makes all these things possible. It takes and transforms team collaboration to a whole new level by providing innovative tools to solve problems faster and allowing team members to focus their time on more urgent matters. 

Here are the three ways how G Suite unlocks the new kind of collaboration that empowers many businesses in the modern world.

  • Jamboard G Suite Transforms the Way Teams Collaborate

In any business, team collaborations have a powerful impact on its success.  And to achieve this kind of feat, more efficient and creative ways of sharing ideas are needed. 

G Suite provides intelligent tools for creating new and effective ways to help team members work faster and smarter. 

The jamboard, for example, is a digital whiteboard powered by G Suite that allows team members to collaborate on different files in real-time regardless of their location. 

With Jamboard’s innovative features, team members can actively collaborate and share their ideas by inserting texts, images, or videos directly from their files or the web.

  • Improves Accessibility and Connectivity with G Suite’s Collaborative Tools

Another way G suite allows team members to connect and work effectively as one team is through different collaborative tools and services. 

These services include custom and secure business emails, integrated online calendars, collaborative word documents, and smart spreadsheets.

The team can also safely meet and connect from anywhere through a video conferencing app built on Google’s robust and highly secure global infrastructure. 

  • Brings Raw Creativity and Organizational Skills to A New Level

The perfect combination of Jamboard and G Suite provides essential solutions to improve creativity and organizational skills among team members.

Teams can also share their creative ideas in real-time through sessions called jams. Each jam session is saved in the cloud and can easily be accessed and shared within the team. 

Files saved in the Google Drive folder can be systematically organized and shared via the cloud. Anyone in the team can always refer back to the previous jam sessions whenever they need to.

With G Suite, important emails can be converted into calendar events and transform team meetings into collaborative sessions within the interactive Jamboard interface. 

In summary, G Suite is a highly intelligent and innovative tool that, when utilized properly and efficiently, can transform and empower any business in achieving great success.

What is the Proper Way of Installing a GPS Antenna for Your Car’s Navigation System?

gpsThe external GPS antenna included with in-dash navigation receivers comes with a few simple rules to follow. The first rule is to not cut the antenna or alter it in any way.
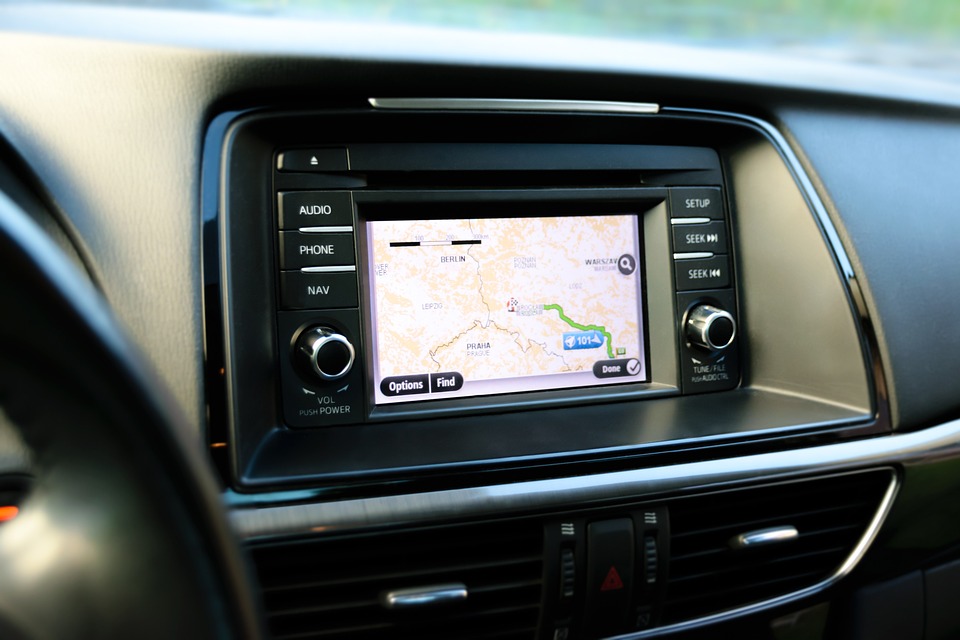
The other rule to keep in mind is that it must keep continuous contact with the GPS satellites that are up above the skies, orbiting the planet. You must install them in such a way that their signal is not hampered, for optimum and uninterrupted connection. 

Due to the exceptional strength and reliability of satellite signals today, installing your antenna on this side of your car should be more than sufficient to sustain good reception. Besides, it is a secure and strategic spot that will help keep the antenna out of sight while serving the purpose of keeping it in place.

When deciding where to put your antenna with GPS antenna functionality, we recommend that you have it on the dashboard. Or you can have it behind the back deck. For as long as it travels into the sky and veers away from two-way antennas, it should be working as expected. 

However, you should consider mounting your antenna on the outside of your vehicle under any of the following conditions:

  • Your vehicle does have a rear defroster that is wired. 
  • Your car does have a metallic window tint.
  • Your car comes with a solar reflective window.
  • There you have on your windshield a fixed windshield radio antenna. 

In addition, the GPS antenna should be leveled and connected to a metal plate or sheet, if one is present. In almost all cases, the antenna will be secured with some type of adhesive. To complete the installation, you’ll need to route the antenna wire to the rear of the receiver in a location such as a trunk, on the floorboard, door seal, or window. 

Connecting the Parking Brake Wire

Any video screen fronting your vehicle, for safety reasons, must be linked to the parking brake wire. This measure will also apply to GPS systems. 

While your vehicle is in active motion, some of its navigation systems are deactivated. If you want to change the unit’s default settings or lookup a particular phone number, then you don’t have much of a choice, but you must first pull over. 

gps travel

If you want to change the unit’s default settings or lookup a particular phone number, then you don’t have much of a choice, but you must first pull over. In some cases, a connection to the foot brake would be necessary as well.

Connecting Reverse Signal Wire

Various navigation systems are also attached to the car’s reverse signal wire. A connection of this kind informs the navigation system when the vehicle is in reverse mode. If this cable is not linked, the direction of the vehicle will not be properly monitored. Hence, the navigation system can’t be expected to operate correctly. 

The most commonly used method is to hook up to the reverse light wire situated directly behind the tail light. A multimeter will be needed to check each wire that goes to the tail light.

To test if the car’s battery is getting a 12V voltage, you should have a multimeter connected to a wire. Ask someone around you to put the car in reverse mode (apply the brake while doing so, of course). Perform this drill with each wire and repeat the process until you identify the correct one.

If you get a 12-volt reading, remember to check the brakes rather than the reverse wire. If you get a reading, moments after the brake is pressed, then you’ve just identified the brake wire.

There are numerous possible locations for the reverse wire; it can be found under the dash or in the engine compartment. We suggest that you first analyze your vehicle’s wiring system to ensure you are getting the right one. It is easy to access by tapping on the tail light.

What is the Proper Way of Installing a GPS Antenna for Your Car’s Navigation System? Read More »

gpsThe external GPS antenna included with in-dash navigation receivers comes with a few simple rules to follow. The first rule is to not cut the antenna or alter it in any way.

The other rule to keep in mind is that it must keep continuous contact with the GPS satellites that are up above the skies, orbiting the planet. You must install them in such a way that their signal is not hampered, for optimum and uninterrupted connection. 

Due to the exceptional strength and reliability of satellite signals today, installing your antenna on this side of your car should be more than sufficient to sustain good reception. Besides, it is a secure and strategic spot that will help keep the antenna out of sight while serving the purpose of keeping it in place.

When deciding where to put your antenna with GPS antenna functionality, we recommend that you have it on the dashboard. Or you can have it behind the back deck. For as long as it travels into the sky and veers away from two-way antennas, it should be working as expected. 

However, you should consider mounting your antenna on the outside of your vehicle under any of the following conditions:

  • Your vehicle does have a rear defroster that is wired. 
  • Your car does have a metallic window tint.
  • Your car comes with a solar reflective window.
  • There you have on your windshield a fixed windshield radio antenna. 

In addition, the GPS antenna should be leveled and connected to a metal plate or sheet, if one is present. In almost all cases, the antenna will be secured with some type of adhesive. To complete the installation, you’ll need to route the antenna wire to the rear of the receiver in a location such as a trunk, on the floorboard, door seal, or window. 

Connecting the Parking Brake Wire

Any video screen fronting your vehicle, for safety reasons, must be linked to the parking brake wire. This measure will also apply to GPS systems. 

While your vehicle is in active motion, some of its navigation systems are deactivated. If you want to change the unit’s default settings or lookup a particular phone number, then you don’t have much of a choice, but you must first pull over. 

gps travel

If you want to change the unit’s default settings or lookup a particular phone number, then you don’t have much of a choice, but you must first pull over. In some cases, a connection to the foot brake would be necessary as well.

Connecting Reverse Signal Wire

Various navigation systems are also attached to the car’s reverse signal wire. A connection of this kind informs the navigation system when the vehicle is in reverse mode. If this cable is not linked, the direction of the vehicle will not be properly monitored. Hence, the navigation system can’t be expected to operate correctly. 

The most commonly used method is to hook up to the reverse light wire situated directly behind the tail light. A multimeter will be needed to check each wire that goes to the tail light.

To test if the car’s battery is getting a 12V voltage, you should have a multimeter connected to a wire. Ask someone around you to put the car in reverse mode (apply the brake while doing so, of course). Perform this drill with each wire and repeat the process until you identify the correct one.

If you get a 12-volt reading, remember to check the brakes rather than the reverse wire. If you get a reading, moments after the brake is pressed, then you’ve just identified the brake wire.

There are numerous possible locations for the reverse wire; it can be found under the dash or in the engine compartment. We suggest that you first analyze your vehicle’s wiring system to ensure you are getting the right one. It is easy to access by tapping on the tail light.

Touch screen Display: How it Dominates the Market

As innovation remains to breakthrough, among the vital restricting elements is exactly how we work together with it. At first, computer systems were managed by a limited sequence of printed cards, after that a narrow collection of input instructions. The mouse leads to a more tactile experience, which brought about touchscreens. Technology is currently being created to enable online swiping in the air over a tool, building a digital user interface that comes to be much more user-friendly. Let us look at existing touchscreen innovation that controls the market as well as explore what could follow.

Present Touchscreen Display Technology

Four modern technologies control the touchscreen market today: capacitive, resistive, infrared as well as surface acoustic wave (SAW).

touch screen

Capacitive touchscreen

It primarily uses an indium tin oxide finishing formed onto a slim glass surface, creating a conductive layer. As soon as a user touches it, the electric pattern is disrupted and took command by the main computer. This technique currently controls the mobile phone as well as tablet computer market. Capacitive displays are the default option when several touchpoints are called for in a reasonably small screen dimension. Substitutes are being pursued because our resource of indium is restricted and climbing in price.

Resistive Touchscreen

This consists of a top-level of polythene and a lower layer of glass, divided by protecting dots. The key benefit is that these are cheaper to produce than capacitive displays, and this expense differential is increased as the screen size enlarges. Since commands are based upon stress, they can entertain both non-finger and finger touches, such as a stylus or gloved hand. These are mainly utilized in general practitioner systems, digital video cameras, and large touchscreen screens. There are two crucial disadvantages below: the top plastic layer is at risk of being scratched, as well as touch is generally restricted to a single point of call, while capacitive touchscreens could allow as much as ten points of call.

mobile phone

Infrared Sensors

This one utilizes LEDs to detect a modification of light when touched. They serve in outdoor settings due to a high level of resistance to contaminants, extremely easy to maintain, and flaunt a lengthy lifespan. They are frequently used in ATMs, exterior kiosks, and factory touchscreen applications. There is no limitation on input materials, so a heavy work glove can adjust the controls. It does not need a pattern on the glass-like capacitive touchscreens, so infrared displays are naturally more robust. Nonetheless, its performance could be adversely affected by intense sunlight, and it is not usually suitable for smaller-sized screens.

SAW Screens

They have a few of the absolute best photo clarity, resolution, and light transmission of any touch screen display technology. It has a lengthy lifespan and is frequently used in high-traffic interior atmospheres like public information booths and computer-based training circumstances. It is not well-suited for outside use: surface area scrapes and contaminants such as water, dust, or pests can considerably reduce performance.

Touch screen Display: How it Dominates the Market Read More »

As innovation remains to breakthrough, among the vital restricting elements is exactly how we work together with it. At first, computer systems were managed by a limited sequence of printed cards, after that a narrow collection of input instructions. The mouse leads to a more tactile experience, which brought about touchscreens. Technology is currently being created to enable online swiping in the air over a tool, building a digital user interface that comes to be much more user-friendly. Let us look at existing touchscreen innovation that controls the market as well as explore what could follow.

Present Touchscreen Display Technology

Four modern technologies control the touchscreen market today: capacitive, resistive, infrared as well as surface acoustic wave (SAW).

touch screen

Capacitive touchscreen

It primarily uses an indium tin oxide finishing formed onto a slim glass surface, creating a conductive layer. As soon as a user touches it, the electric pattern is disrupted and took command by the main computer. This technique currently controls the mobile phone as well as tablet computer market. Capacitive displays are the default option when several touchpoints are called for in a reasonably small screen dimension. Substitutes are being pursued because our resource of indium is restricted and climbing in price.

Resistive Touchscreen

This consists of a top-level of polythene and a lower layer of glass, divided by protecting dots. The key benefit is that these are cheaper to produce than capacitive displays, and this expense differential is increased as the screen size enlarges. Since commands are based upon stress, they can entertain both non-finger and finger touches, such as a stylus or gloved hand. These are mainly utilized in general practitioner systems, digital video cameras, and large touchscreen screens. There are two crucial disadvantages below: the top plastic layer is at risk of being scratched, as well as touch is generally restricted to a single point of call, while capacitive touchscreens could allow as much as ten points of call.

mobile phone

Infrared Sensors

This one utilizes LEDs to detect a modification of light when touched. They serve in outdoor settings due to a high level of resistance to contaminants, extremely easy to maintain, and flaunt a lengthy lifespan. They are frequently used in ATMs, exterior kiosks, and factory touchscreen applications. There is no limitation on input materials, so a heavy work glove can adjust the controls. It does not need a pattern on the glass-like capacitive touchscreens, so infrared displays are naturally more robust. Nonetheless, its performance could be adversely affected by intense sunlight, and it is not usually suitable for smaller-sized screens.

SAW Screens

They have a few of the absolute best photo clarity, resolution, and light transmission of any touch screen display technology. It has a lengthy lifespan and is frequently used in high-traffic interior atmospheres like public information booths and computer-based training circumstances. It is not well-suited for outside use: surface area scrapes and contaminants such as water, dust, or pests can considerably reduce performance.

How to Have a Stronger WiFi Antennas Signal?

Now that much of our daily activity is highly dependent on a reliable connection to the Internet, the flexibility of use is essentially important here. When we say flexible, this means to say that we should be able to access the Web despite surrounding and existing physical constraints. 

This will include limited cables/wires, wall partitions, down to, etc. The most practical workaround here is to go on wireless connectivity mode. 

WiFi antenna provides the wireless connectivity we need. The stronger our wireless signal is, the better connection we have. However, since we are invariably in the habit of unconsciously moving away from the source of our WiFi signal, it will cause our wireless signal to drop. 

cyberspace

If you dare to go further away from the wireless antenna, you will soon enter the dark zone. At this point, you will have lost connection already. This is the place that your current WiFi won’t be able to reach anymore. A dead zone.  

It is good to know that we can boost our home WiFi signal today and also extend its coverage area. Hence, never lose your signal again and thus remain connected to your network. 

There are a handful of ways to boost your WiFi signal. Here is a rundown of some of them. 

  1. Relocate your router or transfer it to another location to boost the Wi-Fi signal
  2. Use a Wi-Fi repeater (Also known as an extender)
  3. Try making your DIY booster for Wi-Fi antenna 
  4. Upgrade your Wi-Fi receivers and antennas 

Move Your Router to Boost Your Wi-Fi Signal

Wherever you decide to have your WiFi router stationed, it is crucial to see to it that its signal will not be compromised. Therefore, take caution on putting your router under the stairs in a cupboard. Do not even have it behind a lump of steel that you have wrapped in aluminum foil. 

If you want to extend the coverage of your Wi-Fi range, router placement is seriously important. Placing your WiFi antenna behind any kind of solid object, such as walls, will certainly cut down your WiFi range.  

Solution: See to it that you have your router stationed in an area that is clear of large objects, clutter, or any other items that can get in the way of your WiFi signal. 

Consider the Use of a Wi-Fi Extender/Repeater

If you happen to have the 802.11ac type of router and yet you are persistently having connectivity issues with it, the most practical solution you can try is to take advantage of a wireless extender. 

wireless home router

WiFi extender gives you a chance to increase the range of coverage of your WiFi router, throughout, say, your home. This will not require you to make use of additional cables. You don’t even have to know anything about or deal with complicated networking. 

For the most part, these devices are easy to install since they come in a plug-and-play unit. Although, this may vary with respect to the make and model.   

Some leading brands of WiFi extenders allow you to plug your device into a nearby power outlet. You connect another plug close to where your router is and with the help of an ethernet cable try connecting the two. Then, you need to place one more adapter where you need your WiFi in your house or office.   

But keep in mind though that powerline adapters may only be as good as your house’s electrical wiring. If your house is particularly old, a powerline WiFi antennas extender may not be able to offer the significant signal boost that you are aiming to have.   

The solution here is to take into account how old your home wiring is. If it is that old already, a dual-band WiFi extender will do a great job as far as your WiFi signal boosting option is concerned. 

How to Have a Stronger WiFi Antennas Signal? Read More »

Now that much of our daily activity is highly dependent on a reliable connection to the Internet, the flexibility of use is essentially important here. When we say flexible, this means to say that we should be able to access the Web despite surrounding and existing physical constraints. 

This will include limited cables/wires, wall partitions, down to, etc. The most practical workaround here is to go on wireless connectivity mode. 

WiFi antenna provides the wireless connectivity we need. The stronger our wireless signal is, the better connection we have. However, since we are invariably in the habit of unconsciously moving away from the source of our WiFi signal, it will cause our wireless signal to drop. 

cyberspace

If you dare to go further away from the wireless antenna, you will soon enter the dark zone. At this point, you will have lost connection already. This is the place that your current WiFi won’t be able to reach anymore. A dead zone.  

It is good to know that we can boost our home WiFi signal today and also extend its coverage area. Hence, never lose your signal again and thus remain connected to your network. 

There are a handful of ways to boost your WiFi signal. Here is a rundown of some of them. 

  1. Relocate your router or transfer it to another location to boost the Wi-Fi signal
  2. Use a Wi-Fi repeater (Also known as an extender)
  3. Try making your DIY booster for Wi-Fi antenna 
  4. Upgrade your Wi-Fi receivers and antennas 

Move Your Router to Boost Your Wi-Fi Signal

Wherever you decide to have your WiFi router stationed, it is crucial to see to it that its signal will not be compromised. Therefore, take caution on putting your router under the stairs in a cupboard. Do not even have it behind a lump of steel that you have wrapped in aluminum foil. 

If you want to extend the coverage of your Wi-Fi range, router placement is seriously important. Placing your WiFi antenna behind any kind of solid object, such as walls, will certainly cut down your WiFi range.  

Solution: See to it that you have your router stationed in an area that is clear of large objects, clutter, or any other items that can get in the way of your WiFi signal. 

Consider the Use of a Wi-Fi Extender/Repeater

If you happen to have the 802.11ac type of router and yet you are persistently having connectivity issues with it, the most practical solution you can try is to take advantage of a wireless extender. 

wireless home router

WiFi extender gives you a chance to increase the range of coverage of your WiFi router, throughout, say, your home. This will not require you to make use of additional cables. You don’t even have to know anything about or deal with complicated networking. 

For the most part, these devices are easy to install since they come in a plug-and-play unit. Although, this may vary with respect to the make and model.   

Some leading brands of WiFi extenders allow you to plug your device into a nearby power outlet. You connect another plug close to where your router is and with the help of an ethernet cable try connecting the two. Then, you need to place one more adapter where you need your WiFi in your house or office.   

But keep in mind though that powerline adapters may only be as good as your house’s electrical wiring. If your house is particularly old, a powerline WiFi antennas extender may not be able to offer the significant signal boost that you are aiming to have.   

The solution here is to take into account how old your home wiring is. If it is that old already, a dual-band WiFi extender will do a great job as far as your WiFi signal boosting option is concerned. 

How to Look for the Right UHF Antenna for Your 4×4?

Many people are wrong to think that buying or acquiring a UHF antenna only deals with finding the biggest, seemingly strongest of its kind. But truth be told, it goes beyond that. There is more to it that we need to be aware of. 

Gone are those days when it is normal to see 4x4s with a black piece of fiberglass. These accessories usually resemble a fishing rod blank and are enveloped in copper wires. You will see them most of the time hanging off the bullbar. 

Most of the time, they come in one-size-fits-all. They run on AM CBs, which are lower types of frequencies, namely 27 MHz (But it is not our focus here now).  

The advent of UHF radios, which is around 477 MHz, spawned the production of more aerials that were primarily intended for application in different environments. The use of UHF laid the foundation for greater improvement of bandwidth (for data quality and voice). 

But because they have a higher frequency, the natural tendency of the radio waves is to go beyond the ionosphere. If that happens, they are off to space.  

So what kind of UHF antenna dBi should you be looking for, and why?  

What is the relevance of dBi with regard to radio signals?

Think of it this way first, you have an invisible doughnut just right above your four-wheel drive’s tip of the aerial. The doughnut is enormous while the hole is tiny. With regard to the dBi rating of the aerial, the doughnut will be stretched. 

It can go, either up or down, even sideways (which is just along the horizontal plane). If there is a higher dBi, it will make the doughnut flatter. If it goes wider with a lower dBi, it tends to be higher but skinnier.  

Different Aerials

 For purposes of uniformity here, we will measure gain either in dBi or in dBd. In a dBi, because we can easily get our heads around it. Besides, there is a bigger percentage of aerials being promoted with the dBi rating only.  

The term dBi technically translates to “decibels related to an isotropic radiator”. For us, the important bit is the number.  

You can imagine dBi in aerials like that of a torch that comes with a focusable beam. Its LED or bulb is the 5W UHF unit, and the aerial is your focusing ring. The torch will still be working the exact 5W, but if you make an effort to focus the beam at around 9 dB, it will go a long way. It would be illuminating only a small percentage of the area over the other side of the camp, but you may not be able to see your awning roof with it or even your feet.  

sattelite antenna

High Gain: 6-9 dBi

These are fairly long, broom-handle-style aerials. They usually work great on a highway that is nice and has a flat terrain. 

As for the doughnut on this one, it comes wide and flat — this allows us to throw a long way with line-of-sight — but will likely put a forest, hill, or building in the way. This occurrence will likely bring about communications issues.  

Medium Gain: 3-6 dBi

These come in the form of a blank black fishing rod and are enveloped in copper wrappings’. Or it can present itself also in a 3-foot stainless-steel rod where the middle is highlighted by a “pig’s tail. Anywhere in this range of dBi, it is bound to get a good compromise between terrain or obstructions and distance to line of sight.

 This range’s signal output will resemble an actual doughnut. Although it is not going to be too flat or too perfectly round either, just right in the middle – all-rounders.  

Low Unity Gain: 0-3 dBi

We often see these in mountainous areas and in cities, too. The purpose of the name is to signify that the aerial pattern is radiating its signal to all 4 directions equally. They come in short and stubby sizes and are highlighted by a heat-shrink coating. 

 This type of aerial will efficiently push its signal over mountains, trees, and buildings. But the only drawback to which is you are compromising range for those to take place.

As for the doughnut, essentially we’ll find it perfectly round. It will bounce over hills and even on 60-storey buildings, as high as it can throw horizontal signals.  


How to Look for the Right UHF Antenna for Your 4×4? Read More »

Many people are wrong to think that buying or acquiring a UHF antenna only deals with finding the biggest, seemingly strongest of its kind. But truth be told, it goes beyond that. There is more to it that we need to be aware of. 

Gone are those days when it is normal to see 4x4s with a black piece of fiberglass. These accessories usually resemble a fishing rod blank and are enveloped in copper wires. You will see them most of the time hanging off the bullbar. 

Most of the time, they come in one-size-fits-all. They run on AM CBs, which are lower types of frequencies, namely 27 MHz (But it is not our focus here now).  

The advent of UHF radios, which is around 477 MHz, spawned the production of more aerials that were primarily intended for application in different environments. The use of UHF laid the foundation for greater improvement of bandwidth (for data quality and voice). 

But because they have a higher frequency, the natural tendency of the radio waves is to go beyond the ionosphere. If that happens, they are off to space.  

So what kind of UHF antenna dBi should you be looking for, and why?  

What is the relevance of dBi with regard to radio signals?

Think of it this way first, you have an invisible doughnut just right above your four-wheel drive’s tip of the aerial. The doughnut is enormous while the hole is tiny. With regard to the dBi rating of the aerial, the doughnut will be stretched. 

It can go, either up or down, even sideways (which is just along the horizontal plane). If there is a higher dBi, it will make the doughnut flatter. If it goes wider with a lower dBi, it tends to be higher but skinnier.  

Different Aerials

 For purposes of uniformity here, we will measure gain either in dBi or in dBd. In a dBi, because we can easily get our heads around it. Besides, there is a bigger percentage of aerials being promoted with the dBi rating only.  

The term dBi technically translates to “decibels related to an isotropic radiator”. For us, the important bit is the number.  

You can imagine dBi in aerials like that of a torch that comes with a focusable beam. Its LED or bulb is the 5W UHF unit, and the aerial is your focusing ring. The torch will still be working the exact 5W, but if you make an effort to focus the beam at around 9 dB, it will go a long way. It would be illuminating only a small percentage of the area over the other side of the camp, but you may not be able to see your awning roof with it or even your feet.  

sattelite antenna

High Gain: 6-9 dBi

These are fairly long, broom-handle-style aerials. They usually work great on a highway that is nice and has a flat terrain. 

As for the doughnut on this one, it comes wide and flat — this allows us to throw a long way with line-of-sight — but will likely put a forest, hill, or building in the way. This occurrence will likely bring about communications issues.  

Medium Gain: 3-6 dBi

These come in the form of a blank black fishing rod and are enveloped in copper wrappings’. Or it can present itself also in a 3-foot stainless-steel rod where the middle is highlighted by a “pig’s tail. Anywhere in this range of dBi, it is bound to get a good compromise between terrain or obstructions and distance to line of sight.

 This range’s signal output will resemble an actual doughnut. Although it is not going to be too flat or too perfectly round either, just right in the middle – all-rounders.  

Low Unity Gain: 0-3 dBi

We often see these in mountainous areas and in cities, too. The purpose of the name is to signify that the aerial pattern is radiating its signal to all 4 directions equally. They come in short and stubby sizes and are highlighted by a heat-shrink coating. 

 This type of aerial will efficiently push its signal over mountains, trees, and buildings. But the only drawback to which is you are compromising range for those to take place.

As for the doughnut, essentially we’ll find it perfectly round. It will bounce over hills and even on 60-storey buildings, as high as it can throw horizontal signals.